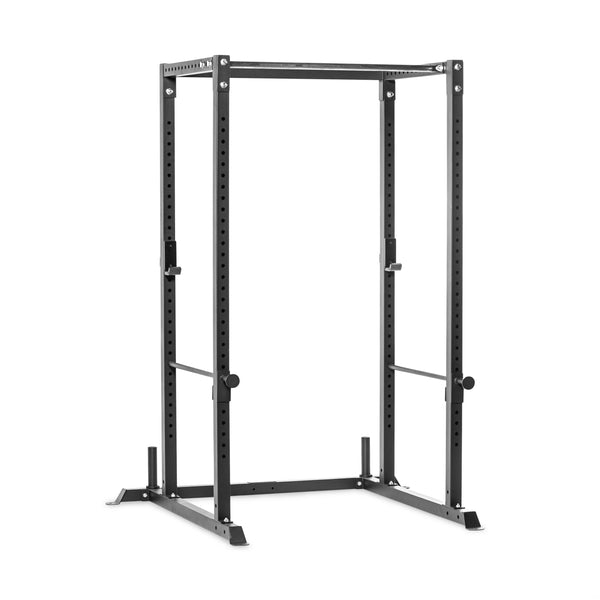
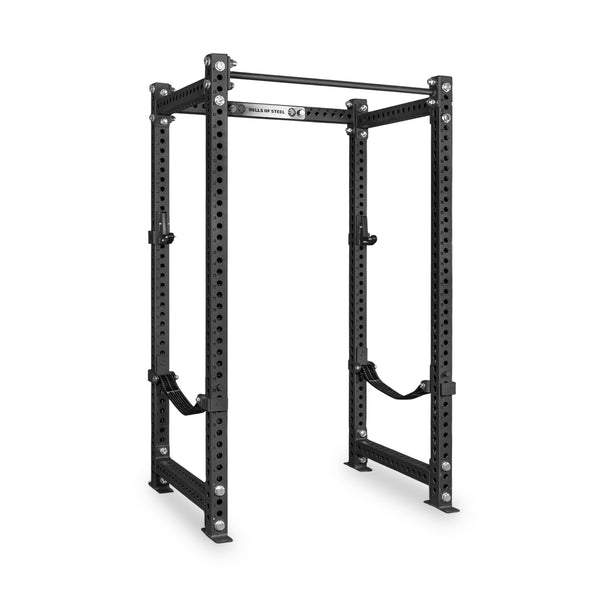
A power rack home gym isn’t one purchase. It’s a rack, plus whatever you bolt onto it over time. Start with a rack sized to your budget and plans (2.3″×2.3″ tubing for a lighter, more budget-friendly build that’s still plenty strong, or 3″×3″ Hydra or Manticore tubing for maximum steel and cross-brand attachment compatibility), add safeties and J-cups on day one, then build outward: pull-up bar, dip bar, landmine, cable attachment, and eventually a full lever-arm or belt squat station.
A modular setup is ideal for anyone who wants a home gym that grows with them instead of a fixed piece of furniture they outgrow in a year.
Why build your home gym around a rack?
Most home gym equipment is single-purpose. A bench is a bench. A treadmill is a treadmill. A power rack is different; it’s a chassis. On its own it holds a barbell for squats, bench, and overhead work, but every hole in the uprights is a place to bolt on something new: a pull-up bar, a dip station, a cable pulley, a landmine sleeve, a leg extension arm.
That’s why the smartest way to build a home gym isn’t to buy a bundle of unrelated machines. Buy one rack sized correctly for your space and budget, then expand it exercise by exercise, attachment by attachment, as your training (and your budget) allows.
Power rack vs. squat rack vs. squat stand: what’s the difference?
In practice, “power rack,” “power cage,” and “squat rack” are used interchangeably by most lifters and most brands, and they generally mean the same fully enclosed, four-post frame with safeties on all sides. The one term that actually signals a real difference is squat stand, which drops the rear uprights and the cage entirely.
| Type | What it is | Best for |
|---|---|---|
| Squat stand | Two independent posts, no rear uprights, no full cage | Minimal footprint, but no dip/pull-up/attachment options |
| Power rack / power cage / squat rack | A fully enclosed four-post (or more) frame with safeties on all sides. These three names are generally interchangeable | Training alone safely, and building out attachments |
For a home gym you plan to actually expand, a fully enclosed rack (whatever your local gym or a product listing happens to call it) is almost always the better foundation than a squat stand: the enclosure is both safer for lifting alone and gives you far more attachment points. For the full breakdown, including half racks and Smith machines, see Power Rack vs Squat Rack vs Half Rack vs Smith Machine.
Which rack system fits your build and budget?
Bells of Steel builds three rack families. The 2.3″×2.3″ and 3″×3″ numbers refer to the steel tubing size. Footprint comes down to which configuration you pick (Flat Foot, Four Post, Collegiate, Six Post, or Folding are all available within each family). What the tubing size actually changes is steel volume, weight rating, and attachment compatibility.
| System | Tubing | Best for | Starting price (USD — CAD, AU & UK pricing available on those storefronts) |
|---|---|---|---|
| 2.3″×2.3″ - the “60mm Series” (Residential / Light Commercial) | Lighter steel profile, still rated for serious lifting | Budget-conscious builds that don’t need cross-brand attachment compatibility | From $399.99 USD |
| Hydra (3″×3″, ⅝″ holes) | Heavier steel profile, standard ⅝″ hole spacing | Home gyms that plan to add several attachments over time, including cross-brand accessories | From $1,280.89 USD (Prebuilt) |
| Manticore (3″×3″, 1″ holes) | Heavier steel profile, 1″ hole spacing | Serious lifters who want maximum durability and attachment compatibility | From $1,275.86 USD (Prebuilt) |
Prices shown in USD for the US site. This post also displays on the CA, AU, and UK storefronts, where these products show in CAD, AUD, and GBP respectively. Pricing subject to change.
Both Hydra and Manticore come as fixed Prebuilt configurations (Flat Foot, Four Post, Collegiate, Six Post, and Folding) or as a Builder you configure piece by piece to your exact space and attachment list. For a full side-by-side breakdown of all three systems, see Building Your Dream Home Gym? Here’s the Power Rack Showdown You Need.
How to build a home gym around a rack, step by step
The steps below cover the essentials. For the full walkthrough on height, depth, width, pull-up bars, safeties, storage, and hardware, see How to Build Your Dream Power Rack (Step-by-Step).
- Measure your space first. Ceiling height, floor footprint, and clearance for pull-ups all rule out or rule in certain rack sizes before you look at a single product.
- Pick your tubing size. Working with a tighter budget or just getting started? 2.3″×2.3″ gives you a lighter, more affordable build that’s still plenty strong. Want maximum steel and cross-brand attachment compatibility as you expand? Go Hydra or Manticore (3″×3″).
- Add safeties and J-cups. These aren’t optional add-ons, they’re what makes a rack safe to lift in alone. Straps, pin pipes, flip-downs, or spotter arms all work differently; see Rack Safety Showdown: The Best Power Rack Safeties for Your Home Gym for a full comparison.
- Add a pull-up bar. The single highest-value first attachment for the widest range of movements.
- Expand into your training gaps. Landmine for rotational core work, dip bar for pressing, cable or lat pulldown attachment for pulling variety, leg extension or belt squat for lower-body isolation.
Shop rack systems
Residential Power Rack
2.3″×2.3″ tubing, ⅝″ holes, a lighter steel profile and a budget-friendly entry point.
Shop Residential Power RackLight Commercial Power Rack
2.3″×2.3″ tubing, ⅝″ holes, a step up in build quality, same tubing size.
Shop Light Commercial Power RackHydra Racks
3″×3″ tubing, ⅝″ holes, more steel, cross-brand attachment compatible, in Flat Foot, Four Post, Collegiate, and Six Post configurations, or build your own.
Shop Hydra RacksManticore Racks
3″×3″ tubing, 1″ holes, the heaviest-duty hole pattern and maximum steel, in Flat Foot, Four Post, Collegiate, Six Post, and Folding, or build your own.
Shop Manticore RacksThe attachment ecosystem: what to add first
This is where a rack-based home gym pulls ahead of a pile of standalone machines: every attachment below bolts onto the same frame you already own.
Standard J-Cups
ShopFlip-Down Safeties
ShopAdjustable Pull-up Bar
ShopLandmine Attachment
ShopY Dip Bar
ShopLat Pulldown & Low Row
ShopSee the full range (cable, storage, and strength attachments) in the Rack Attachments collection.
Frequently asked questions
What’s the difference between a power rack and a squat rack?
In practice, not much. Most lifters and most brands use “power rack,” “power cage,” and “squat rack” interchangeably to mean the same fully enclosed frame with safeties on all sides. The real distinction is between that enclosed design and a squat stand, which drops the rear uprights and the cage entirely.
Do I need a full power rack, or is a squat stand enough?
A squat stand works for basic squat and press support in a very tight space, but it can’t take the range of attachments a full rack can: no dip bar, no lat pulldown, no landmine. If you plan to expand your home gym over time, a power rack is the better long-term foundation.
What’s the difference between 2.3″×2.3″ and 3″×3″ racks?
The number refers to the steel tubing size, not the rack’s footprint. Footprint depends on the configuration you choose (Flat Foot, Four Post, Six Post, and so on). 2.3″×2.3″ (the 60mm Series) uses less steel and costs less while still being rated for serious lifting; 3″×3″ Hydra and Manticore racks use more steel and are built around the ⅝″ or 1″ hole spacing most cross-brand attachments are designed for, so they’re the better foundation if you plan to add a lot of third-party gear.
What attachments should I buy first for a power rack?
Safeties and J-cups first. They're not optional, they're what makes solo lifting safe. After that, a pull-up bar is the highest-value first addition, followed by a dip bar or landmine attachment depending on your training goals.
How much does it cost to build a full home gym around a rack?
A basic setup (rack plus safeties, J-cups, and a pull-up bar) can start under $700 USD on a 2.3″×2.3″ rack. A fully built-out Hydra or Manticore system with multiple attachments typically runs $1,500–$3,000+ USD, built out over time rather than in one purchase.
Related reading
- Power Rack vs Squat Rack vs Half Rack vs Smith Machine — safety, footprint, pull-ups, attachments, and cost, compared.
- How to Build Your Dream Power Rack (Step-by-Step) — a deeper walkthrough of height, depth, width, and hardware choices.
- Building Your Dream Home Gym? Here’s the Power Rack Showdown You Need — 60mm Series vs. Hydra vs. Manticore, side by side.
- Rack Safety Showdown: The Best Power Rack Safeties for Your Home Gym — straps, pin pipes, flip-downs, and spotter arms compared.
- Can I Have a Home Gym in an Apartment? Yes—But Read This First — including the no-bolt Hydra Collegiate setup.
Ready to build?
Configure your own setup with the Hydra or Manticore Builder — a built-in 3D visualizer lets you see your rack and every attachment before you buy — or browse the full rack lineup.
Shop Hydra Racks Shop All Racks